
Printing Wetting, Ink Adhesion and Film Performance
Ink Adhesion on Plastic Film: Check the Film Surface Before Ink Rubs Off or Fails the Tape Test
Most ink adhesion failures on PE, PP, PET, PVC and vinyl film start at the film surface. Measure water contact angle and surface energy on each film lot before printing, so low or faded treatment and additive bloom are caught before tape and rub tests fail.

Written by
Gurdeep Singh Saini
Holds a BASc in Mechanical Engineering from Ryerson University (now Toronto Metropolitan University) and an MASc from York University. He develops the automatic edge and baseline detection behind the Dropometer's analysis.
COO at Droplet Lab
Read More

Technical Review by
Droplet Lab Team
Droplet Lab builds precision instruments and software for surface science measurement, specialising in contact angle analysis and surface tension characterisation. Used by researchers across materials science, pharmaceuticals, coatings, and advanced manufacturing, Droplet Lab's Dropometer has contributed to studies published in peer-reviewed journals including Advanced Functional Materials (Impact Factor 19). The team combines instrument engineering with deep domain knowledge in wettability science with a focus on practical accuracy.
Read More
Reviewed By
Droplet Lab Team
Droplet Lab builds precision instruments and software for surface science measurement, specialising in contact angle analysis and surface tension characterisation. Used by researchers across materials science, pharmaceuticals, coatings, and advanced manufacturing, Droplet Lab's Dropometer has contributed to studies published in peer-reviewed journals including Advanced Functional Materials (Impact Factor 19). The team combines instrument engineering with deep domain knowledge in wettability science with a focus on practical accuracy.


Validated measurement approach for film and ink checks
How the Dropometer itself has been validated, and how the check fits adhesion standards.
Peer reviewed method
The Dropometer drop shape method is published in Review of Scientific Instruments and Colloids and Surfaces A. Contact angle was validated against a KRUSS DSA100E, with a published accuracy of 0.35°.
See the validation papersHow it fits adhesion and film standards
ASTM F2252 is the tape practice for inks and coatings on flexible packaging, ASTM D3359 was developed with metal as the substrate, and ASTM D5264 covers rub resistance of printed materials. ASTM D5946 covers water contact angle on treated film and warns that contact angle alone is not a complete measure of adhesion. The film check sits upstream of these tests.
Read the ASTM D3359 pageExample film and ink adhesion log
Example data only. Your values and gates will differ and must come from your own tape and rub results.
How to read this log
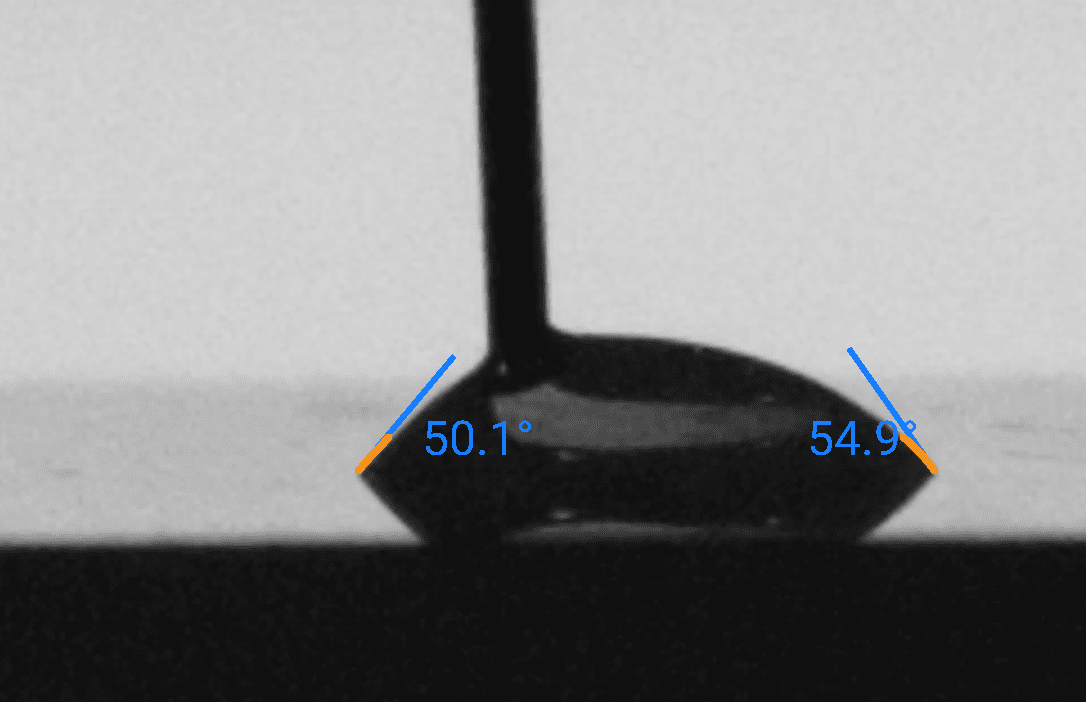
Example gate: water contact angle at or below 72° on this BOPP film. Lot A passed on fresh film. Lot B was treated correctly but stored too long, and the angle rose past the gate. Lot C read well, but the UV ink failed the tape test, which points to the ink or cure rather than the film. Compare your own films against our surface free energy of common polymers reference.
Example data, not customer data. Treated BOPP film; 2 µL water drops read at 2 s; median of 5 spots per zone.
Report a correction
Spotted an issue in this summary? Send a correction request and our team will review it.
Correction Request
We work hard to keep this page accurate and up to date. If you spot an error (wrong revision/year, missing requirement, incorrect interpretation, or broken link), tell us and we'll review it.
Contact us to report a correctionReferences
1.
Seidelmann, L. J. W., Bradley, J. W., Ratova, M., Hewitt, J., Moffat, J., Kelly, P. Reel to reel atmospheric pressure dielectric barrier discharge (DBD) plasma treatment of polypropylene films. Applied Sciences 7(4):337, 2017. https://doi.org/10.3390/app7040337
2.
Aydemir, C., Altay, B. N., Akyol, M. Surface analysis of polymer films for wettability and ink adhesion. Color Research and Application 46(2):489 to 499, 2021. https://doi.org/10.1002/col.22579
3.
Rentzhog, M., Fogden, A. Effect of corona treatment of PE coated board on water based flexographic print resistance. Nordic Pulp and Paper Research Journal 21(2):202 to 210, 2006. https://doi.org/10.3183/npprj-2006-21-02-p202-210
4.
Gajadhur, M., Stec, A. Improvement of abrasion resistance by over varnishing in the case of water based flexographic printing. Journal of Print and Media Technology Research 5(1):15 to 26, 2016. https://doi.org/10.14622/JPMTR-1425
5.
Slobodianyk, V., Koniukhova, I. Determining the influence of surface energy of polymer films on the wetting and adhesion of flexographic inks. Eastern European Journal of Enterprise Technologies 3(6):6 to 14, 2026. https://doi.org/10.15587/1729-4061.2026.360827
6.
Suzer, S., Argun, A., Vatansever, O., Aral, O. XPS and water contact angle measurements on aged and corona treated PP. Journal of Applied Polymer Science 74(7), 1999.
https://repository.bilkent.edu.tr/items/becd1ca4-ed04-4ba8-af64-59a25cc4a998
7.
Coelho, F. Synthesis and evaluation of amides as slip additives in polypropylene. Carl Hanser Verlag, 2015.
https://doi.org/10.3139/217.3097
8.
Ligon, S. C., Husar, B., Wutzel, H., Holman, R., Liska, R. Strategies to reduce oxygen inhibition in photoinduced polymerization. Chemical Reviews 114(1):557 to 589, 2014.
https://doi.org/10.1021/cr3005197
9.
ASTM F2252/F2252M-25. Standard practice for evaluating ink or coating adhesion to flexible packaging materials using tape.
https://store.astm.org/f2252_f2252m-25.html
10.
ASTM D3359-23. Standard test methods for rating adhesion by tape test. See our ASTM D3359 page.
https://store.astm.org/d3359-23.html
11.
ASTM D5264-98(2019). Standard practice for abrasion resistance of printed materials by the Sutherland rub tester.
https://store.astm.org/d5264-98r19.html
12.
ASTM D2578-23. Standard test method for wetting tension of polyethylene and polypropylene films.
https://store.astm.org/d2578-23.html
13.
ASTM D5946-24. Standard test method for corona treated polymer films using water contact angle measurements. See our ASTM D5946 page.
https://store.astm.org/d5946-24.html
14.
Chen, X. et al. Contact angle measurement with a smartphone. Review of Scientific Instruments 89(3):035117, 2018.
https://pubs.aip.org/aip/rsi/article-abstract/89/3/035117/368179/Contact-angle-measurement-with-a-smartphone
15.
Surface tension measurement with a smartphone using a pendant drop. Colloids and Surfaces A: Physicochemical and Engineering Aspects.
https://www.sciencedirect.com/science/article/abs/pii/S0927775717307744