- The contact angle measurement starts off with project creation as explained in the How to Create a New Project article.
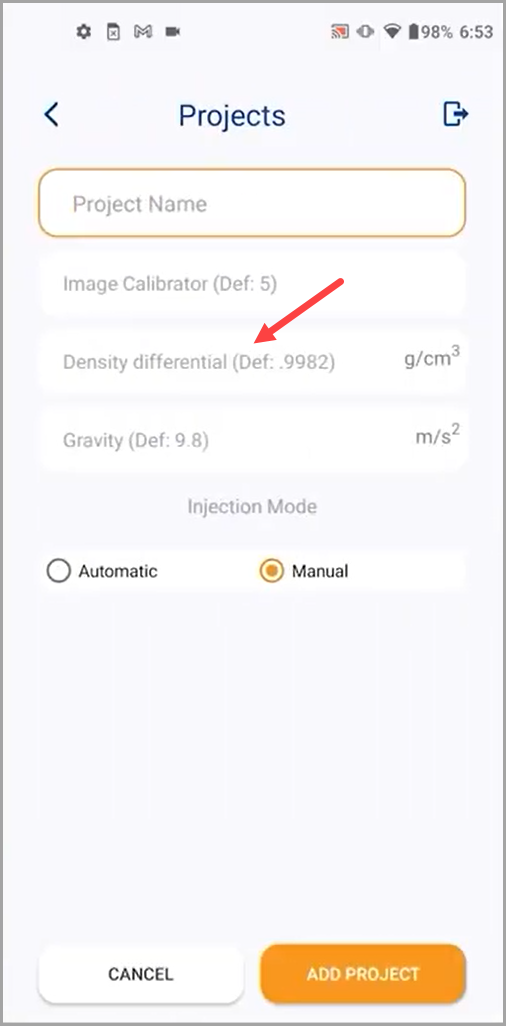
- While creating the project, make sure that you leave the density differential to its default value since the experiment does not include liquid and liquid.
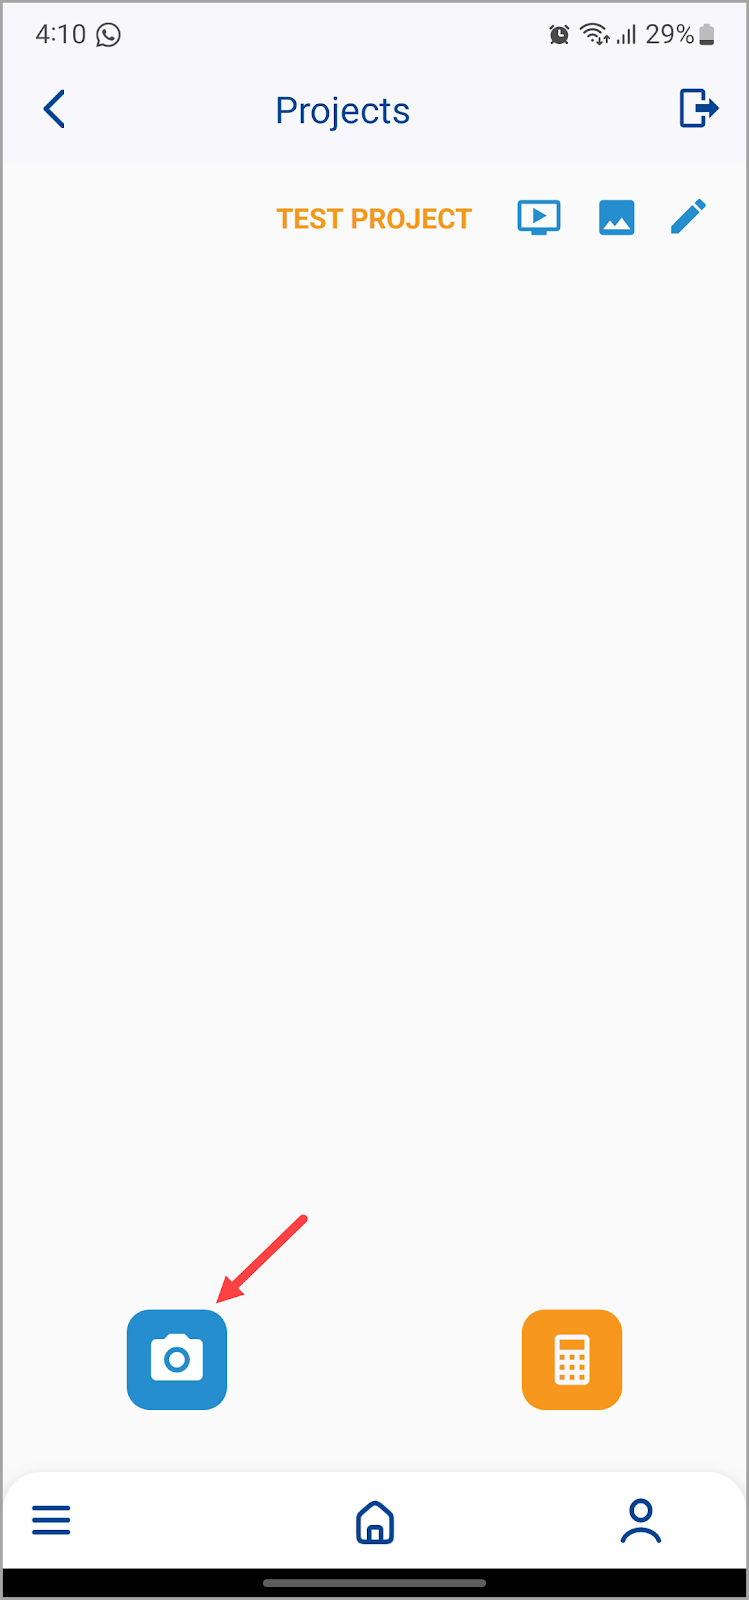
- Once the project is created, tap the project tile to open the selected project.
- From the screen that follows, tap the capture image button located at the bottom-left corner.
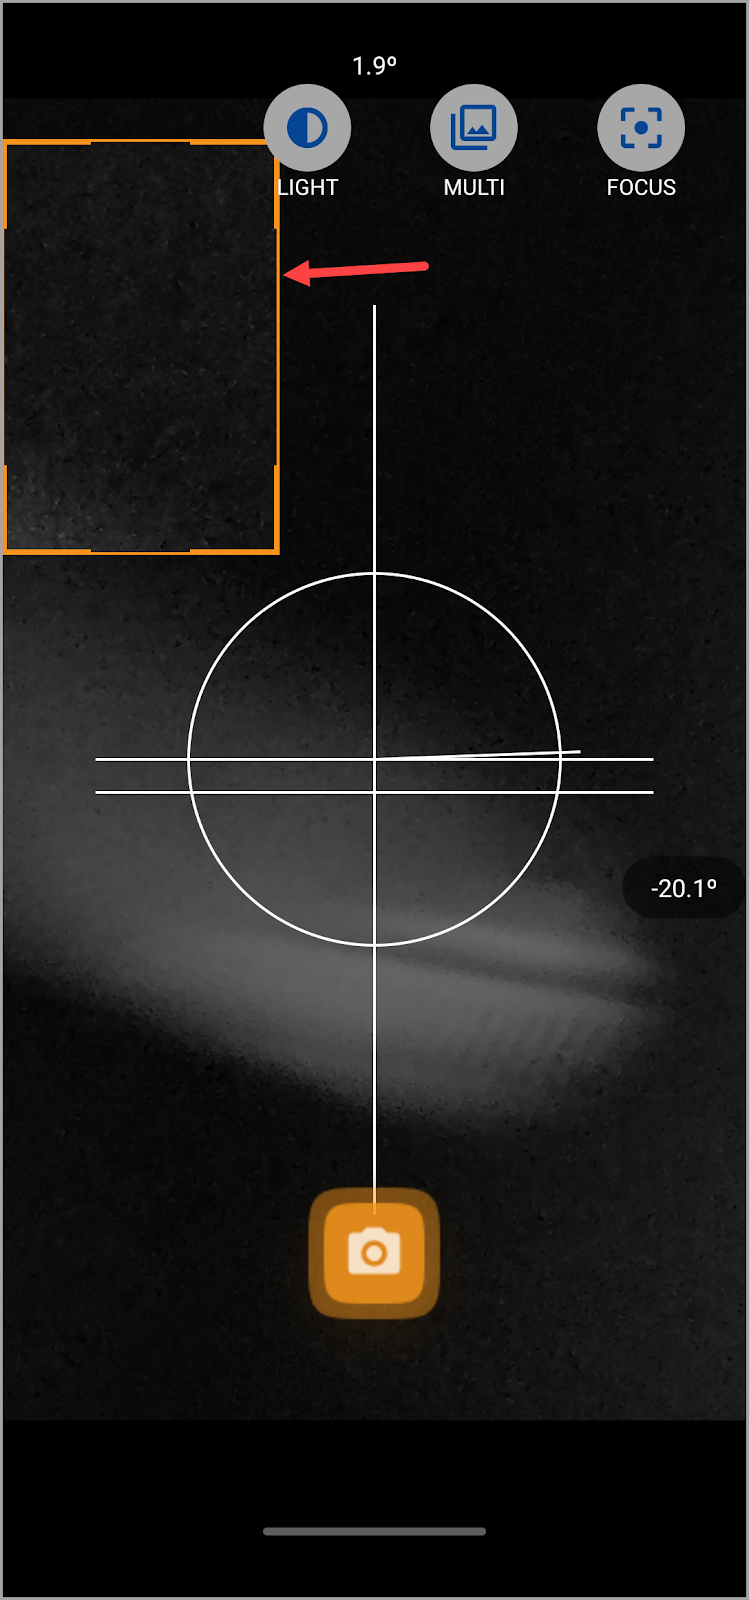
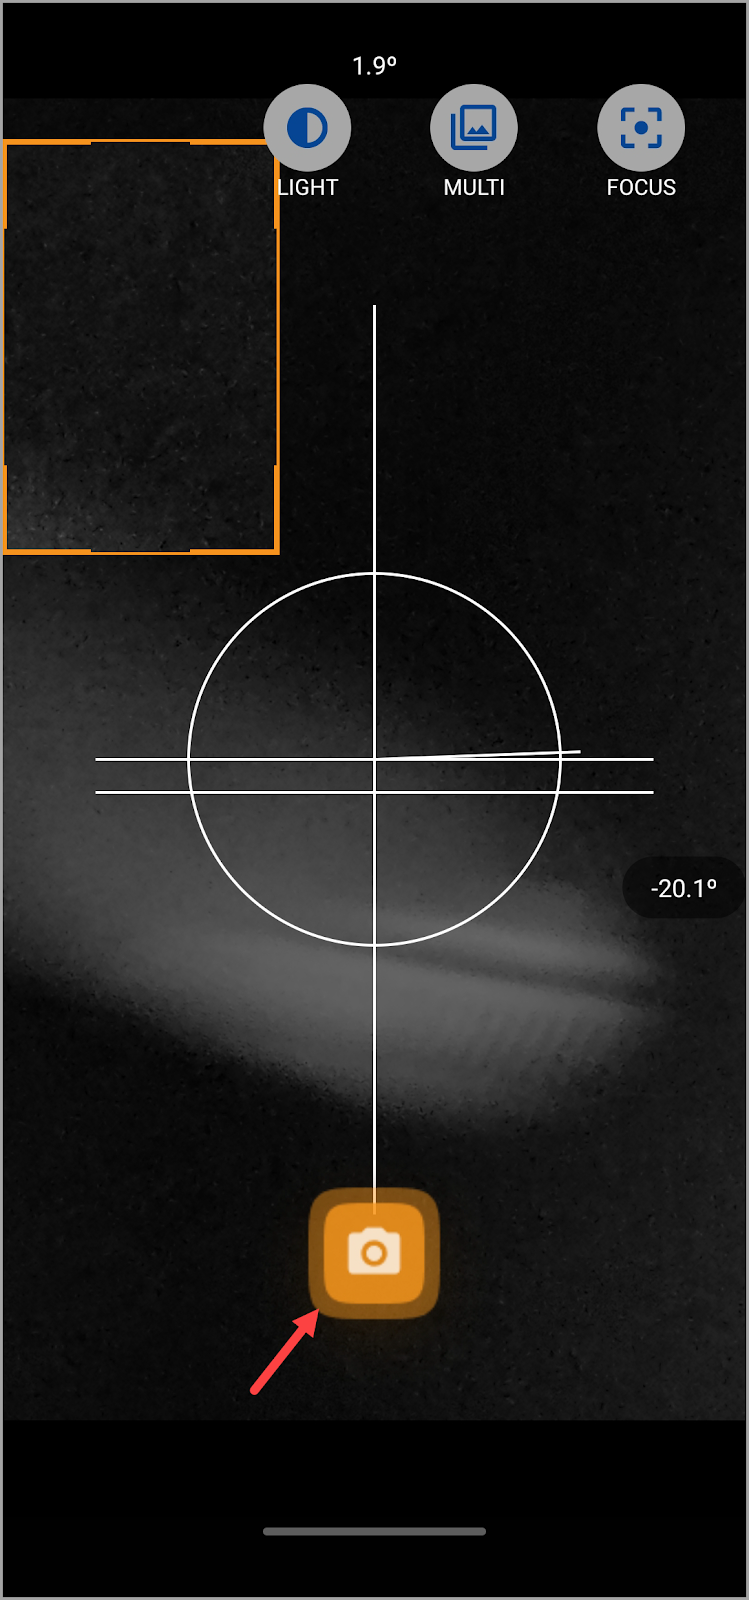
- As the camera opens, adjust the distance from the needle in a way that you do not lose focus.
- Drag and adjust the orange box to select the area you want to capture.
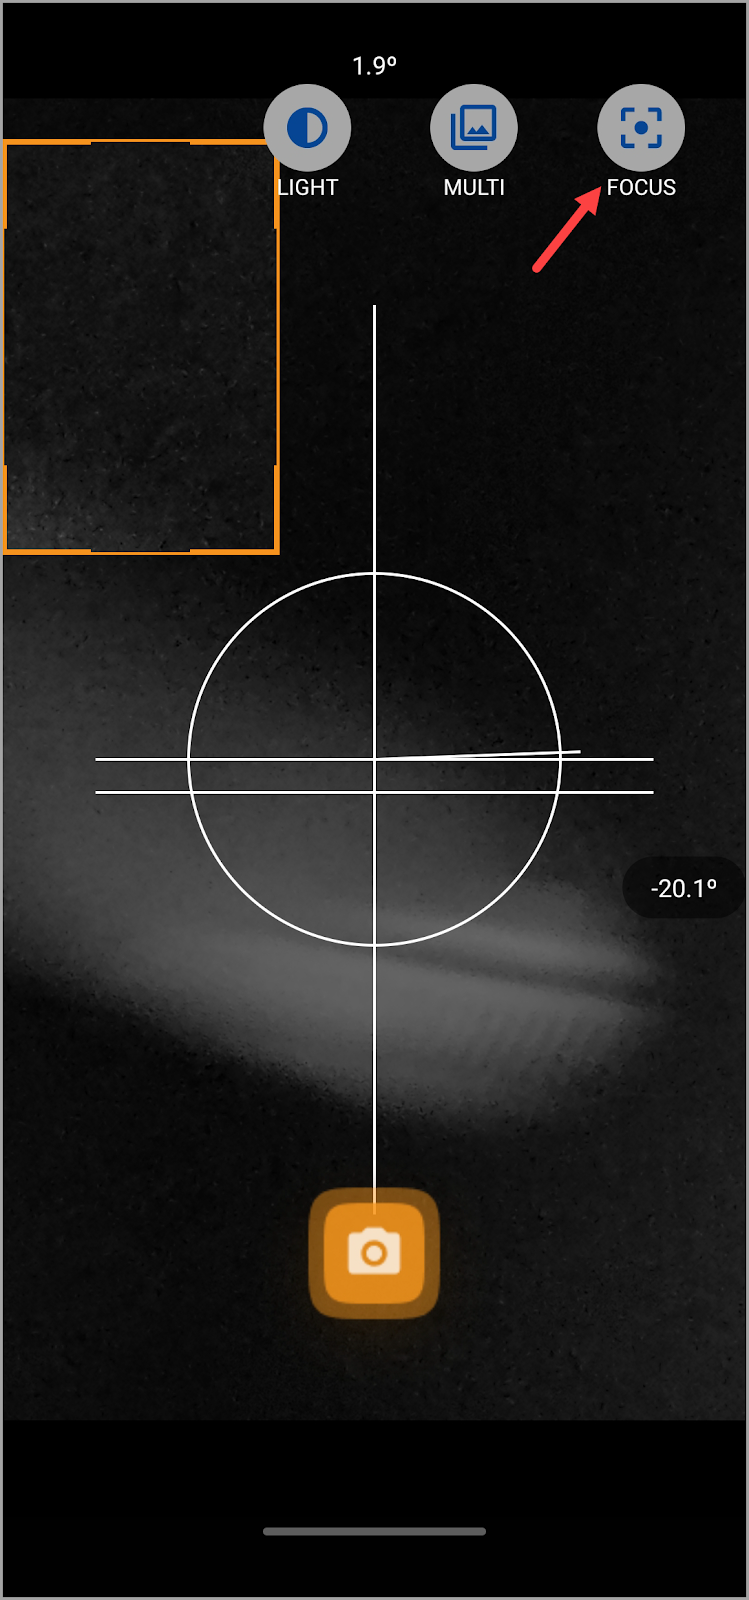
- To ease it out, tap the Focus button atop the screen so that you can adjust the focus slider in order to obtain the best results. You need to be as close to the droplet as possible without losing focus.
- Once the required adjustments are made, tap the capture button. Doing so displays a preview of the captured image with the contact angle details.
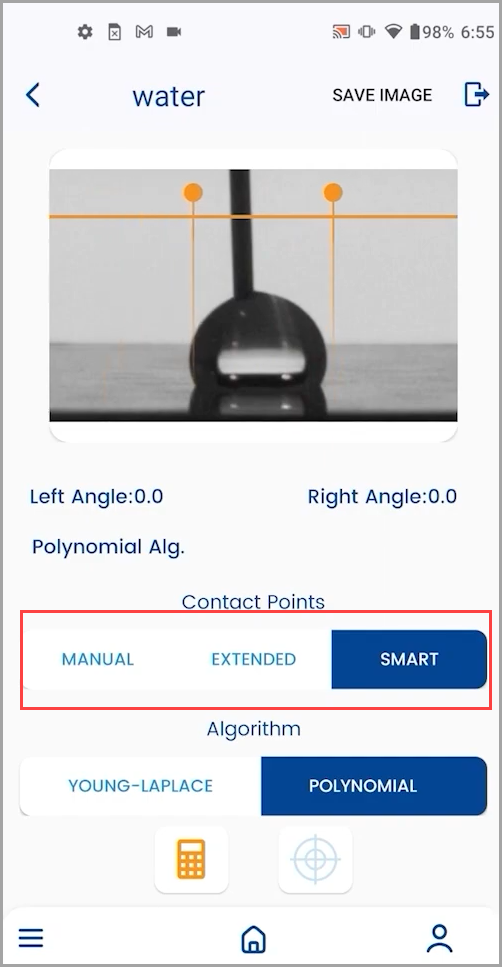
- Here, you can see the Contact Points heading with three options below it. They include Manual, Extended, and Smart. By default, the Smart contact points method is selected. This method only requires you to provide an estimate of the contact points at the baseline and right and left. The exact contact points are then auto-detected by the system.
- The default algorithm for calculation is the Polynomial algorithm.
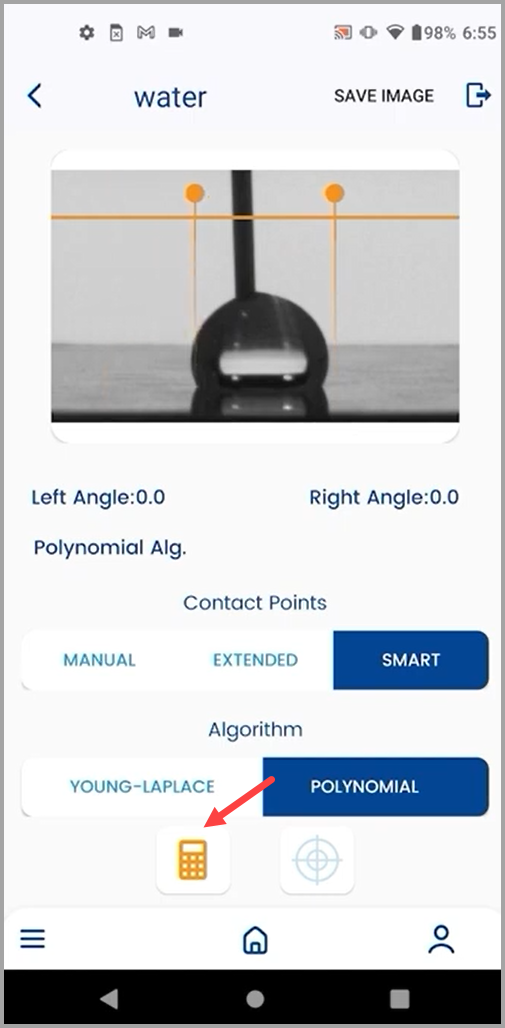
- Once the required adjustments are made, tap the calculate button.

Tips and Tricks
For best results, place the phone as close to the droplet as possible while keeping the droplet in focus and the focus slider set to its maximum value.
Moreover, you can get the best contrast between the droplet and the background by adjusting the LED light on the base plate.
To better configure the image settings, capture a test droplet.
Here, a useful tip to keep in mind is not mistaking the reflection of the droplet for the original droplet while capturing the baseline.

The Young Laplace method has already been explained in detail in the How to Calibrate the Instrument? article.