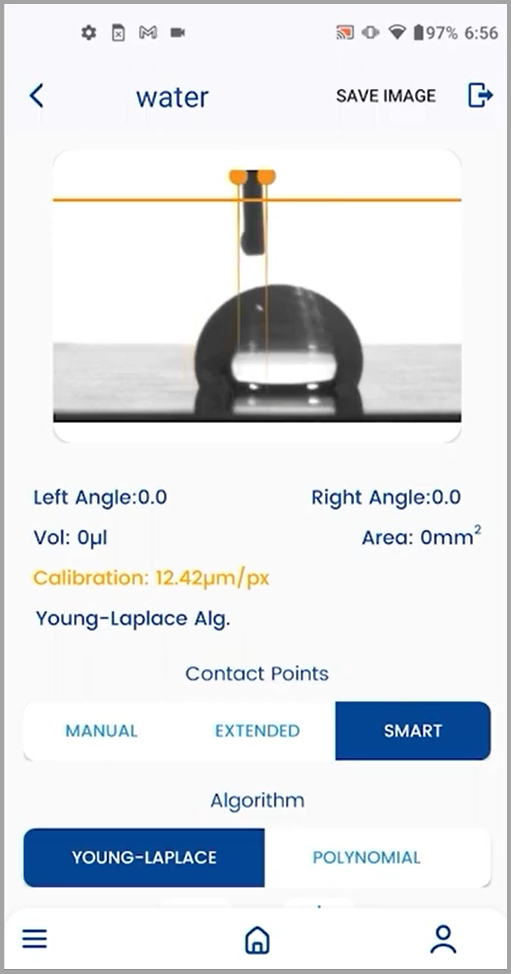
The instrument can be calibrated once you have captured the droplet image using the capture feature available in the projects. Only the Young Laplace method requires calibration. This method is the recommended method for axi-symmetric drops and it averages out the difference between left and right contact angles.
- Once the image of the droplet is captured, the image preview is displayed along with all the calibration details.
- The needle needs to be outside the captured droplet unlike for the polynomial method.
- After that, the calibration process comes into play. Starting off, drag the orange colored points present to the left and right side of the needle.
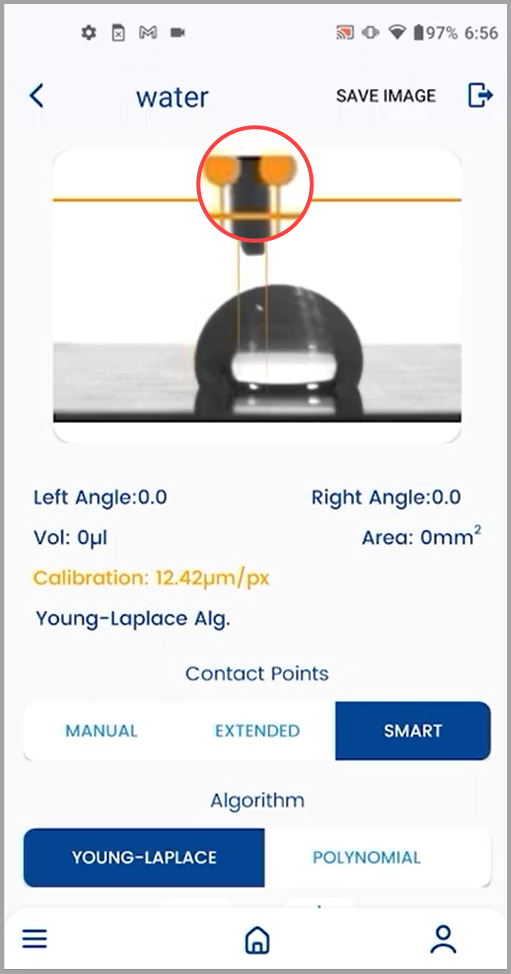
- Once the points are adjusted on both sides of the needle, tap the
button.
- The calibration value is then displayed on the screen. If it is displayed in green, it indicates that the calculated number is correct.
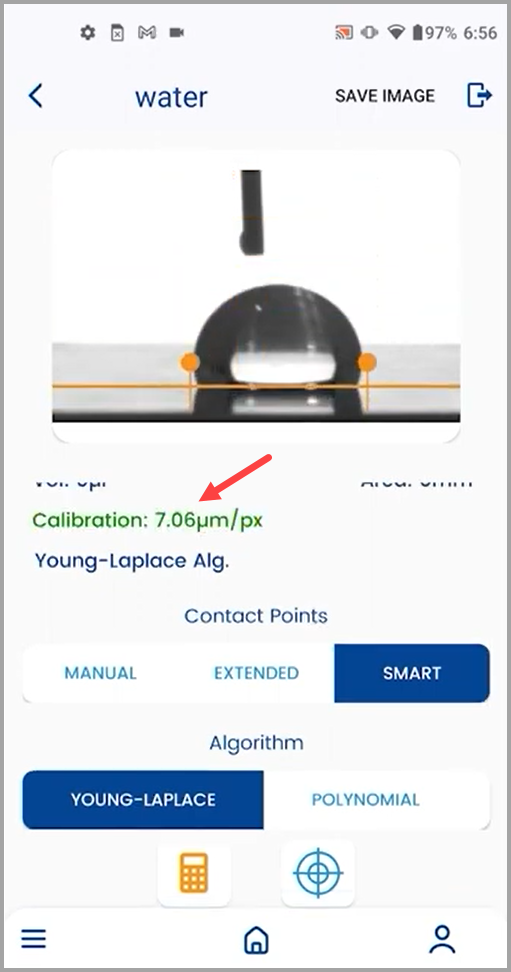
- However, the calibration value being displayed in yellow or red color indicates an issue with the calibration. In this scenario, the drop is most likely too far away from the camera. We recommend to deposit the drop as possible to the camera as the maximum focus allows which is the maximum value of the focus slider. Alternately it is an error with the image calibration number; measure the needle thickness and try the calibration process again.
Tip: The lower the value of the calibration, the better it is for obtaining precise results in measurement.